 Pay My Bills
 Report a Problem
 Start / Stop/ Move Service
 Business
Conservation Audits
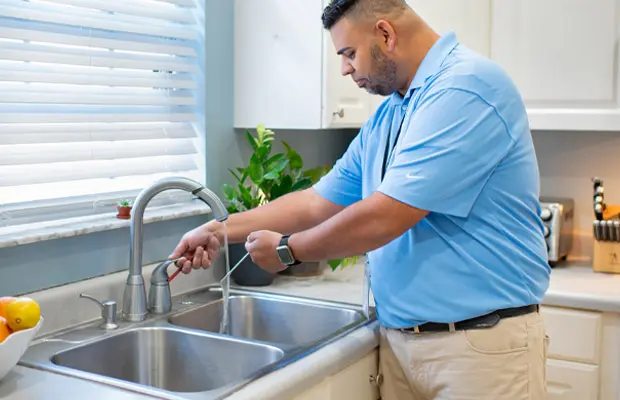
Request an appointment to have OUC to conduct a free energy and water assessment at your address so you can start saving more on your utility bill.
How it Works
With this free offering, a trained OUC conservation specialist will review your personal usage with you, ask questions and perform a walkthrough of your home or business to identify ways to reduce your electric and/or water consumption.
Request an Audit
Request an audit by phone or by filling out the appropriate form below.
Identify Opportunities
An OUC conservation specialist will identify opportunities to reduce consumption.
Receive a Report
You’ll receive a report with money-saving efficiency tips and recommended measures.
Request Your Free Audit
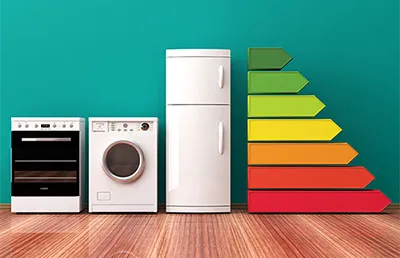
Audits For Your Home
Discover ways to make your home more energy and/or water-efficient and save money.

Audits For Your Business
Learn about energy and water conservation measures you can implement to reduce your bills.

Real Stories from Real Customers
“The Conservation Specialist came to our office in Concord St. to perform a Commercial Water Audit. He called me to explain his recommendations and followed up with a 7-page written report. He was extremely thorough, professional, and polite. He was also knowledgeable and familiar with this area.”
Residential Conservation Kits
OUC provides complimentary energy and/or water conservation kits during home audits. Each kit includes easy-to-use items that can improve energy and water efficiency in your home.
Check out the FAQ section below to find out what’s included in each kit and get installation tips for many of the items included.

Frequently Asked Questions
What does my home Audit Include?
This is an in-person visit which typically lasts for about an hour. In addition to reviewing your consumption information, during the walkthrough, we’ll check the following items:
- Energy efficiency areas: attic insulation and central air-conditioning ducts (single-family homes only), A/C system filters, window caulking, appliances, lighting, thermostat, windows, weather stripping around doors and hot water temperature.
- Water efficiency areas: toilets, faucets, shower heads, water heater, irrigation timers and systems.
What does my Business Audit Include?
This is an in-person visit that typically lasts for about one to two hours. In addition to reviewing your consumption information, during the walkthrough, we’ll check the following items at your facility(s):
- Building envelope, including insulation
- HVAC systems
- Lighting
- Refrigeration equipment
- Water heating
- Pumps and motors
- Indoor and outdoor water consumption
How Should I prepare for the audit?
Before the Audit
To provide you with the best service, we ask that you have at least six (6) months of consumption history at your property before requesting an audit. For solar customers, please have your system’s monthly production data available for review during the visit.
Scheduling the Audit
Our conservation specialists perform energy and water audits Monday – Friday with the first appointment beginning at 8 a.m., and the last appointment as a window arrival of 2 p.m. – 5 p.m. Please note that during our peak season (June through October), we may be booked with appointments for up to six weeks.
During the Audit
Ensure that someone over 18 years of age will be available to accompany the conservation specialist around your property. We’ll need access to items like the thermostat, A/C equipment, attic access, etc. Be sure to provide a translator if needed.
What comes in the Energy Conservation Kit?
Two (2) 19-9-Watt LED Bulbs
Safety first! Turn off power to existing light bulbs and allow them to cool if incandescent. Luckily your new LED light bulbs will last longer and will not produce much heat. Gently remove the existing light bulbs by turning them counterclockwise. Now you can replace them with your LED light bulbs by slowly twisting them clockwise until secure.
Two (2) LED Night Lights
Night lights are ideal for high-traffic areas such as hallways and can help you feel safer when placed in kitchens, bathrooms and bedrooms. Using high-efficiency LED night lights allows you to see your surroundings without having to turn on bright lamps or overhead lighting. Simply plug in your LED night lights where you prefer without having to worry about unplugging them. These night lights have a sensor to automatically turn on in darkness and off in light while always remaining cool to the touch.
One (1) Roll of Weather-Stripping
Proper insulation keeps your house cool in warm weather and warm in cool weather. Your roll of weather-stripping can help seal windows and door frames to reduce temperature fluctuation in your home. Start by removing old stripping and using soap and water on a rag to wipe away any remaining residue. Dry the frame with another rag. Then measure the top and sides of your frame with a tape measure. Using the measurements you record, carefully cut the pieces of your weather stripping to the corresponding lengths. For windows, you will need a total of four strips, one for the top, one for the bottom, and one for each side.
For doors, you will need a total of three strips, one for the top and one for each side. Depending on the condition of your windows and doors, you may not need to add weather-stripping to every side. After evaluating the condition of the frames and cutting the stripping as needed, it’s time to apply your new strips. Line the first piece along the side of the frame, starting with the top corner. Once held in place, remove the backing of the weather stripping with the sticky side against the frame and press it firmly against the frame. Repeat the placement process for the remaining sides.
What comes in the Water Conservation Kit?
Two (2) Toilet Tank Dye Tablets
Toilet tank dye tablets allow you to detect a toilet leak quickly and efficiently. To perform a toilet leak test, you’ll start by removing your toilet tank lid and placing it gently out of the way where it cannot get damaged. Check the water level inside the tank to make sure it’s at the indicated line. If you make any adjustments to the water level, be sure to flush the toilet once to reset it. Now you can drop a single dye tablet into the tank, making sure NOT to flush. Allow it to dissolve for 15 minutes. After 15 minutes, look for any color within your toilet bowl. Color in your toilet bowl indicates there is an ongoing leak from your tank to the bowl that can be resolved by replacing your toilet’s flapper valve.
Two (2) 1.5 Gallon Per Minute Low-Flow Showerheads
Low-flow showerheads are designed to use less water than standard showerheads, allowing you to conserve more water in the long run. To replace your showerheads with your low-flow showerheads, begin by protecting your shower arm by wrapping a rag around it. Using an adjustable wrench, gently loosen and unscrew the old showerhead. With the old showerhead removed and set aside, take a moment to clean any residue or buildup off the threads of the shower arm and wrap it clockwise with new plumbing tape. This will ensure a tight seal and prevent any leaks. With your new low-flow showerhead in hand, gently turn it until firmly in place on the shower arm. You can then secure it further by wrapping your rag around the shower head and tightening it with your wrench, making sure not to over-tighten. View this video to see how it’s done.
One (1) Universal Fit Toilet Flapper
When water leaks from your toilet tank and into your bowl (as proven with your toilet tank dye tablets), your toilet flapper most likely needs to be replaced. The first step is to turn off the water to your toilet by locating the shutoff valve against the wall that is connected to the water line connected to your toilet. Turning the dial clockwise until it stops moving shuts off the water to prevent the tank from refilling while you install the new flapper. Now that your toilet water supply is off, you can gently remove the toilet tank lid, setting it aside. Then, flush your toilet holding the handle down to empty the remaining water in the tank. Now remove the old flapper by unhooking the chain and removing the rubber tabs from the valve pegs.
Before installing your new flapper, make sure it matches the size of the old one. If it’s the correct size, you can install it. Start by setting the flapper over the valve opening at the bottom of the tank and sliding the rubber tabs over the valve pegs and clipping the chain to the lower end of the toilet handle lever. Adjust the chain length so that the flapper can open and close easily. The ideal amount of tension on the chain will allow the flapper to lift easily when flushed, while still allowing it to seal completely. Once in place, you can turn your water back on by moving the dial on the water valve connected to the toilet counterclockwise. When the water has refilled the tank, your new flapper should create a watertight seal and prevent water from running. If water still runs, your flapper may need further adjustment. Once the tank is filled and you have confirmed no water is running, you can place the toilet tank lid back on the tank. Toilet flappers should typically be replaced every two to three years. View this video to see how it’s done.
One (1) Five Minute Suction Cup Shower Timer
For maximum water conservation, it is recommended to take a five-minute shower. Shower timers make it easy to reach that goal, helping you stay on track by bringing awareness to the amount of time you are using water. You can easily attach your shower timer to the wall tiles in your shower, a glass shower door, or even your bathroom mirror. Simply flip it over when you are ready to hop in the shower and try to complete it before all the sand reaches the bottom of the timer.
One (1) Low-Cost Rain Gauge
A rain gauge is used to measure precipitation, which is useful when it comes to knowing how often your grass or plants need to be watered. Typically, a healthy lawn needs no more than one inch of water per week. If your rain gauge collects one inch of water after it rains, your lawn should not require irrigation for at least another week. You can also use your rain gauge to determine if your plants need water as well. Using the water nature has already provided helps conserve water and avoid overwatering. For the most accurate reading, it is important to place your rain gauge in the ground so that it sits level and is out in the open, keeping it far enough from any obstructions (i.e. trees, buildings, fences, etc.) that could prevent rain from reaching it.
Related Content
Save Energy & Water Tips
Discover simple things you can do to conserve energy and water—and save money!
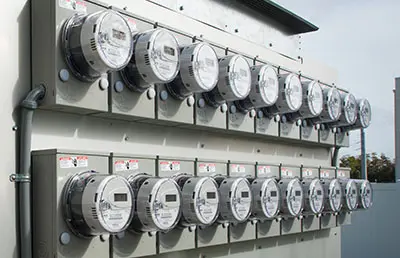
Digital Smart Meters
Learn how to read OUC’s digital meters so you can track your energy and water usage online on your myOUC account.

My Usage Dashboard
Monitor your energy and water consumption by the day or hour with your OUC Usage Dashboard. Set up alerts and view usage trends.
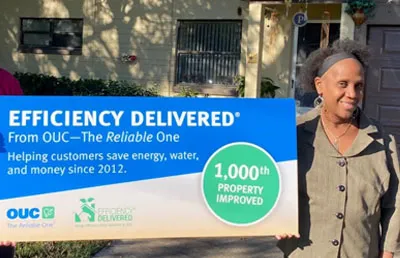
Efficiency Delivered®
Efficiency Delivered® offers up to $2,500 in rebates for energy and water-saving home upgrades. OUC covers up to 85% of the cost, based on income.

Rebates
Apply for rebates on a variety of energy and water-saving upgrades—from heat pump A/C units to smart irrigation controllers and even electric vehicles.

Solar Programs
From the SunChoice community solar program to resources for rooftop solar panel users, OUC is committed to making solar accessible for all customers.